Connection
Last updated
Was this helpful?
Last updated
Was this helpful?
Region
Service Region Name
e.g.) ap-northeast-2
Access Key ID
Access Key ID issued from IAM
Refer to "How to find API Keys" tab
Secret Access Key
Secret key associated with the access key
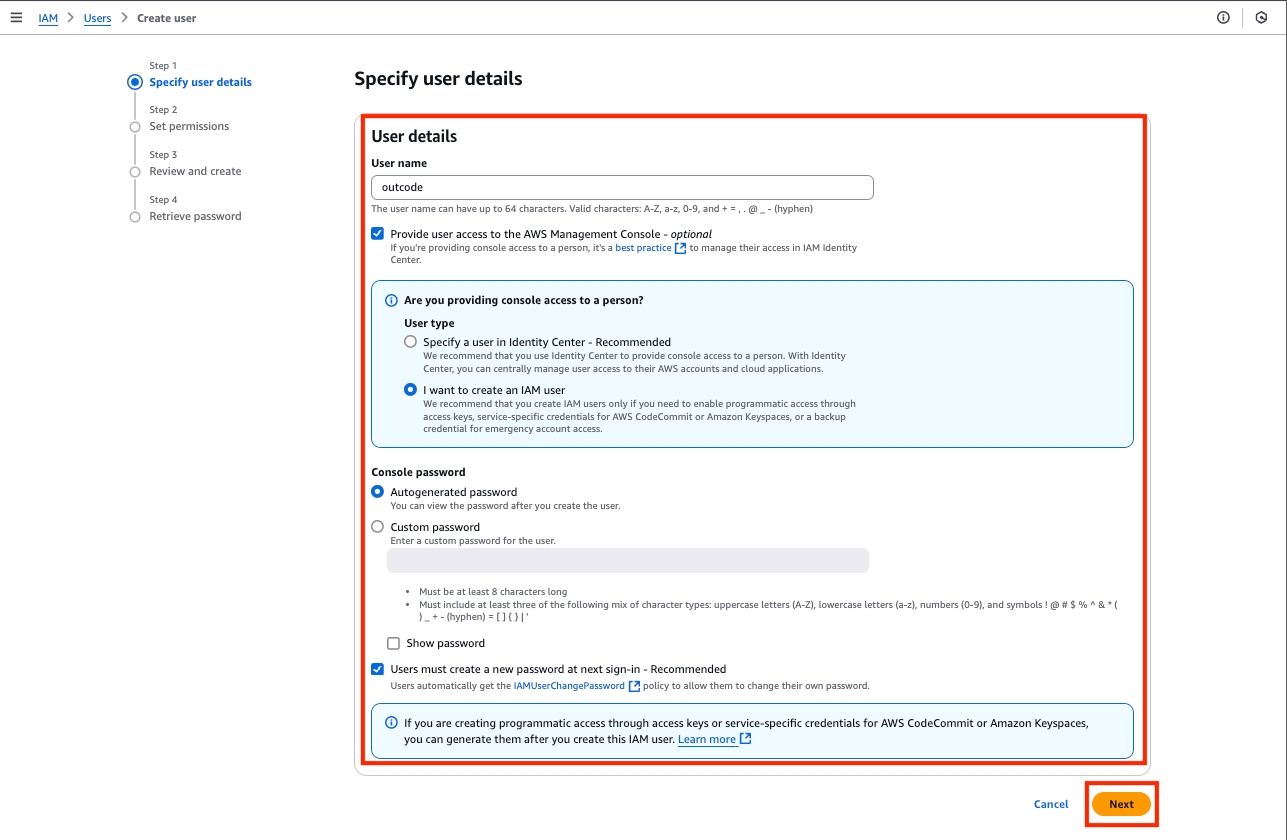
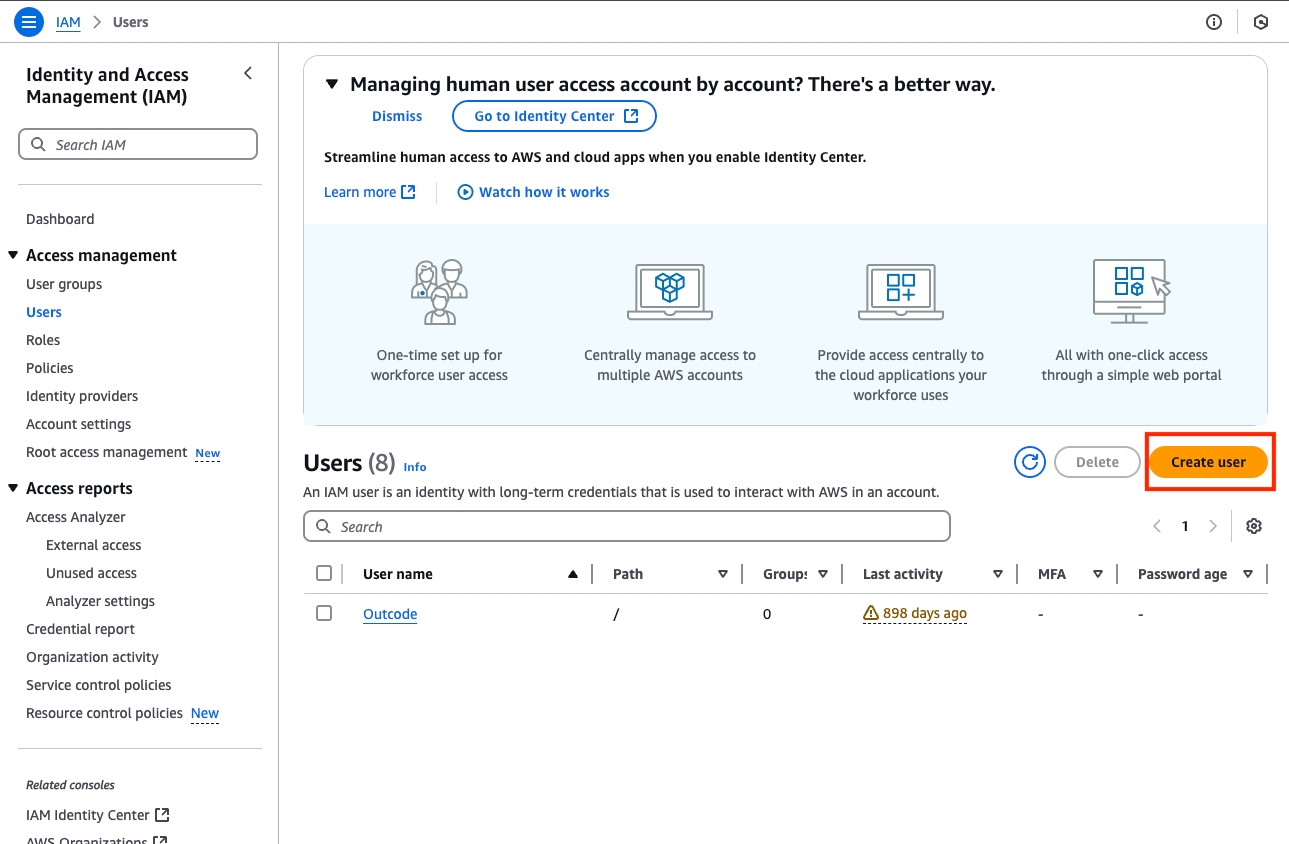
Go to the IAM menu and create a new user.
Configure the user settings as shown in the screen below.
Username: Specify the name of the user who will access the AWS Console.
Check the option “Provide user access to the AWS Management Console.”
Under User type, select “I want to create an IAM user.”
For Console password, you can either auto-generate or manually set a password.
Users must create a new password at next sign-in: Choose whether the user must change their password upon first login.
Once all settings are complete, click the Next button.
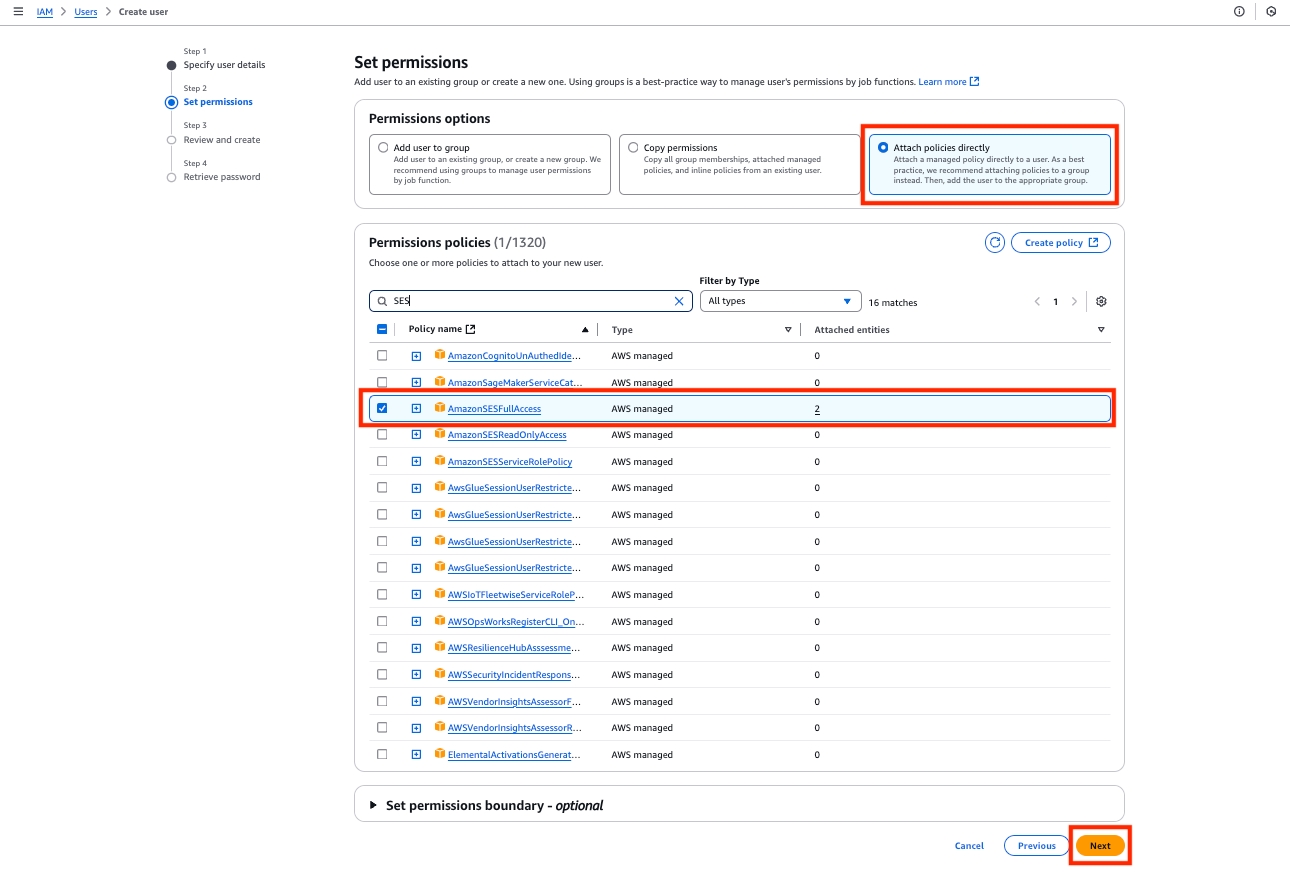
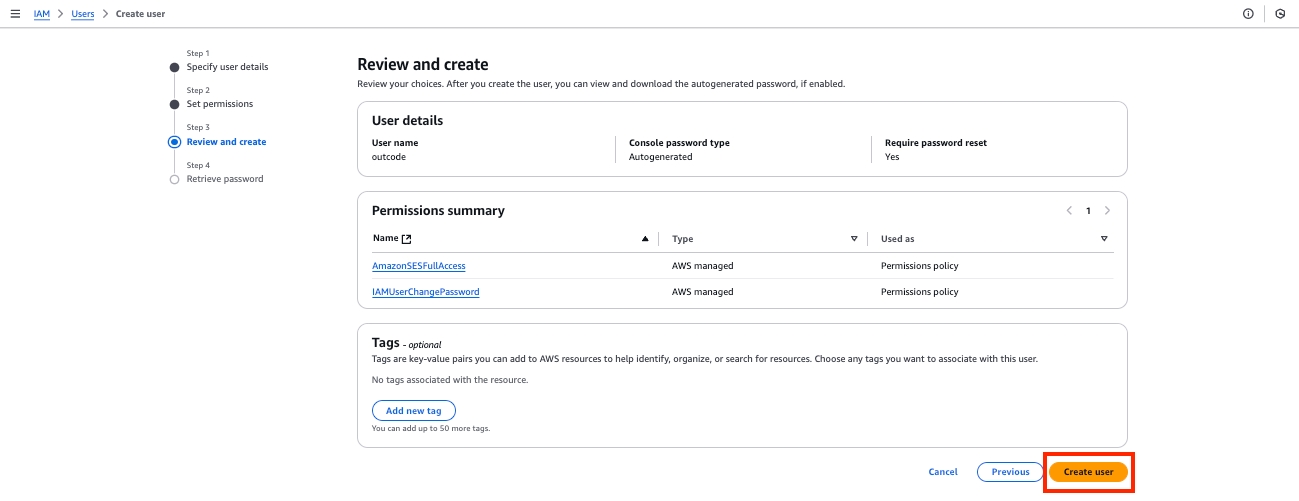
Assign instance access permissions to the user.
In the Permission Options, select Attach policies directly — this means you will use existing permission policies.
Choose the AmazonSESFullAccess policy.
Once selected, click the Next button.
Review the permission settings, then click the Create user button to create the new account.
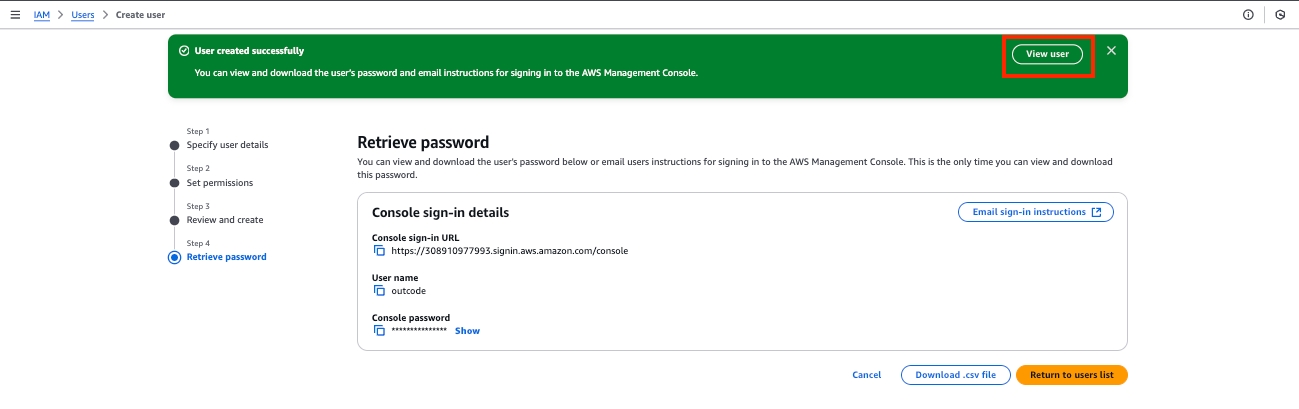
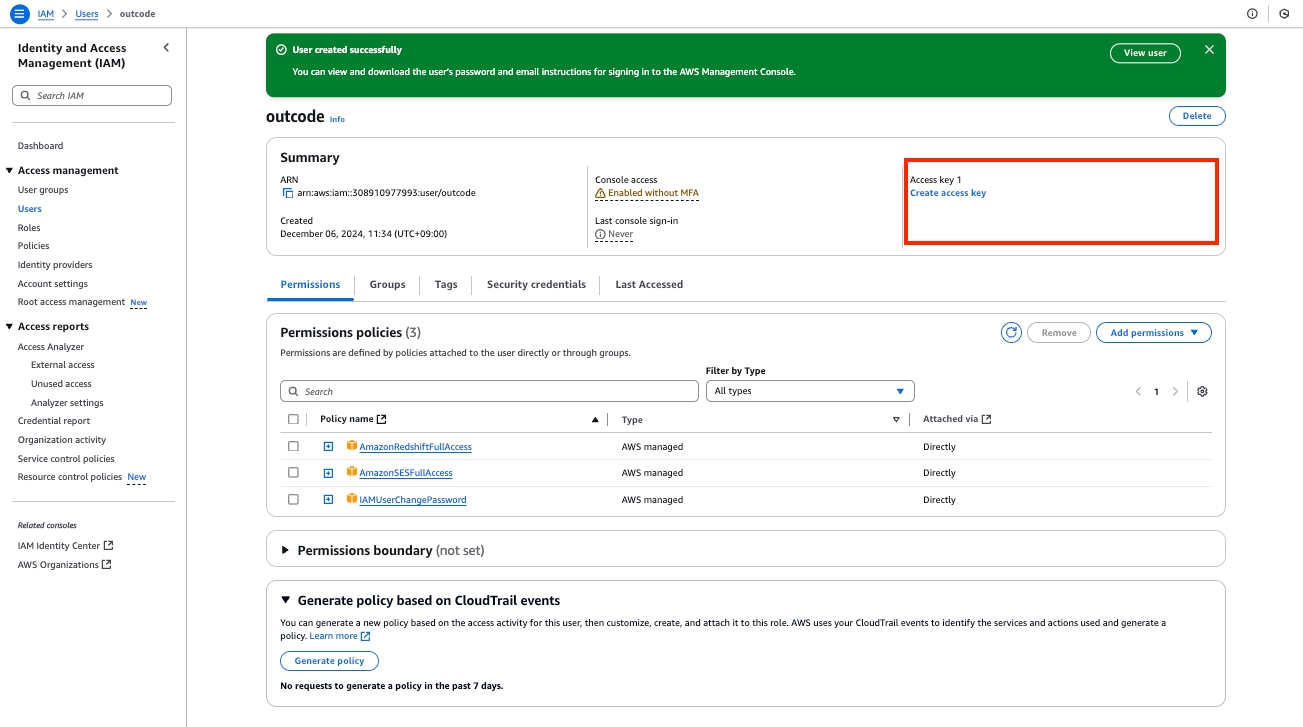
If the user is successfully created, a success modal will appear. Click the View User button on the right side of the modal to access the detailed user properties.
To generate an Access Key for connecting to Outcode, click Create access key to begin the creation process.
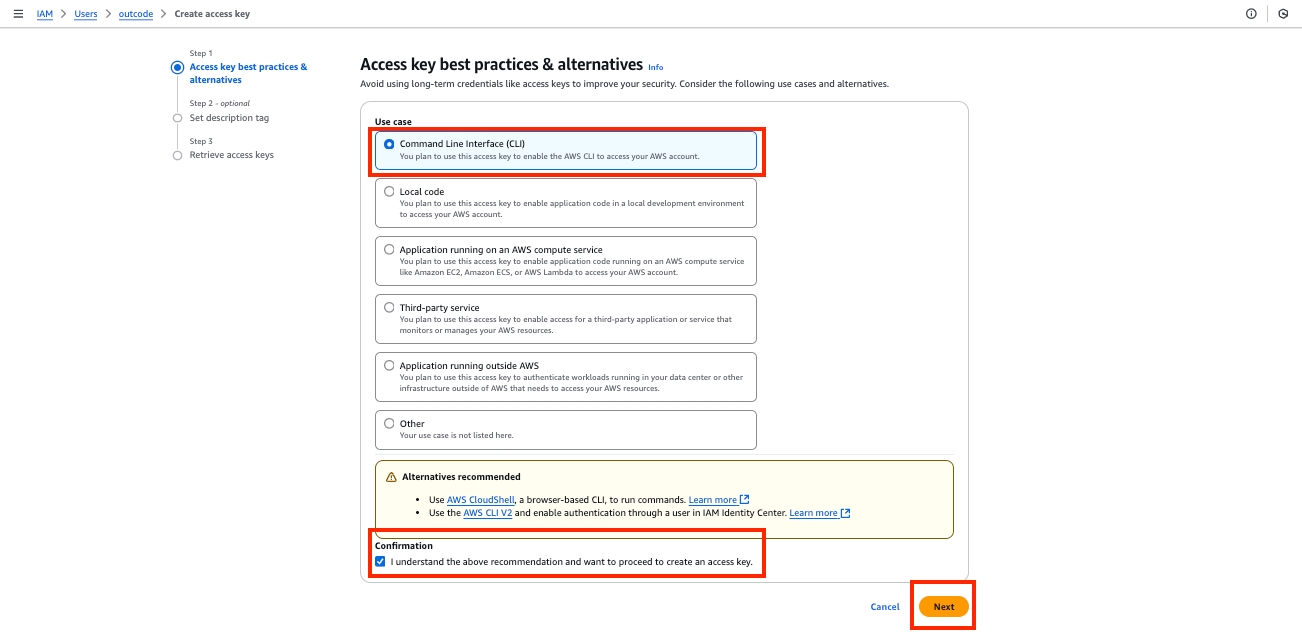
Configure the Access Key creation options according to the screen shown below, then click the Next button.
For Use case, select Command Line Interface (CLI).
Check the Confirmation box, then click the Next button.
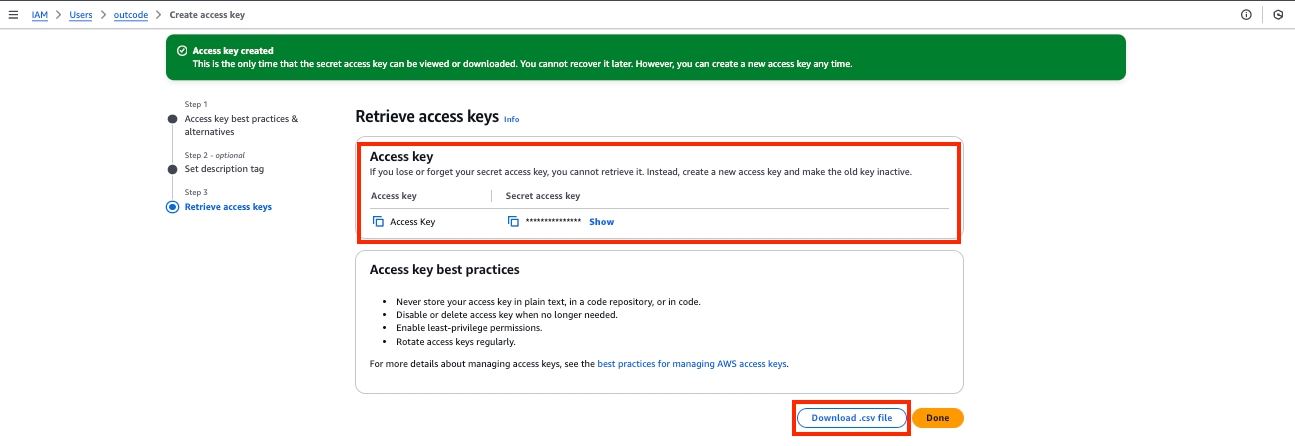
Enter a description (tag) for the Access Key, then click the Create access key button to generate the key.
The Access Key to be used when creating the Outcode app has been generated. Once the page is closed or navigated away from, the key cannot be retrieved again. Please copy it to a secure location or download it using the "Download .csv file" button below for safekeeping. Be sure to keep the issued Access Key confidential and do not expose it to external parties.
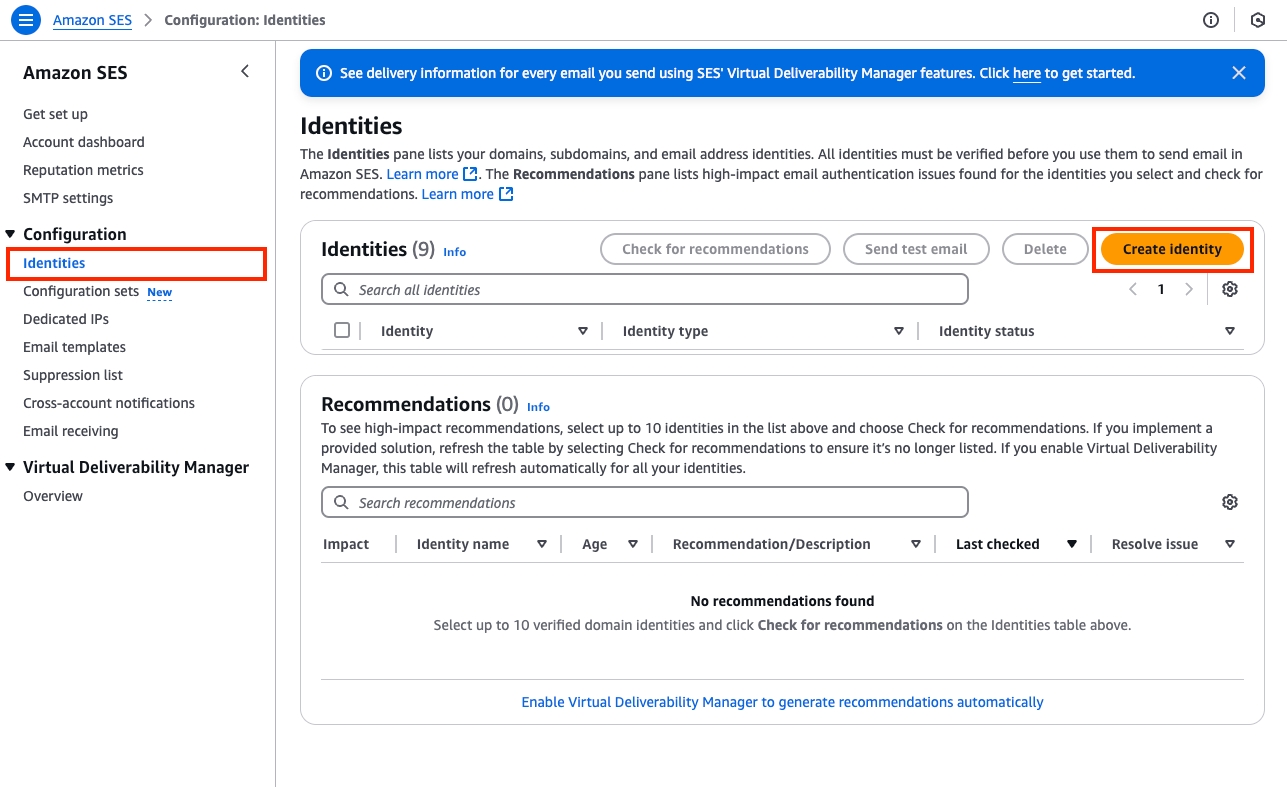
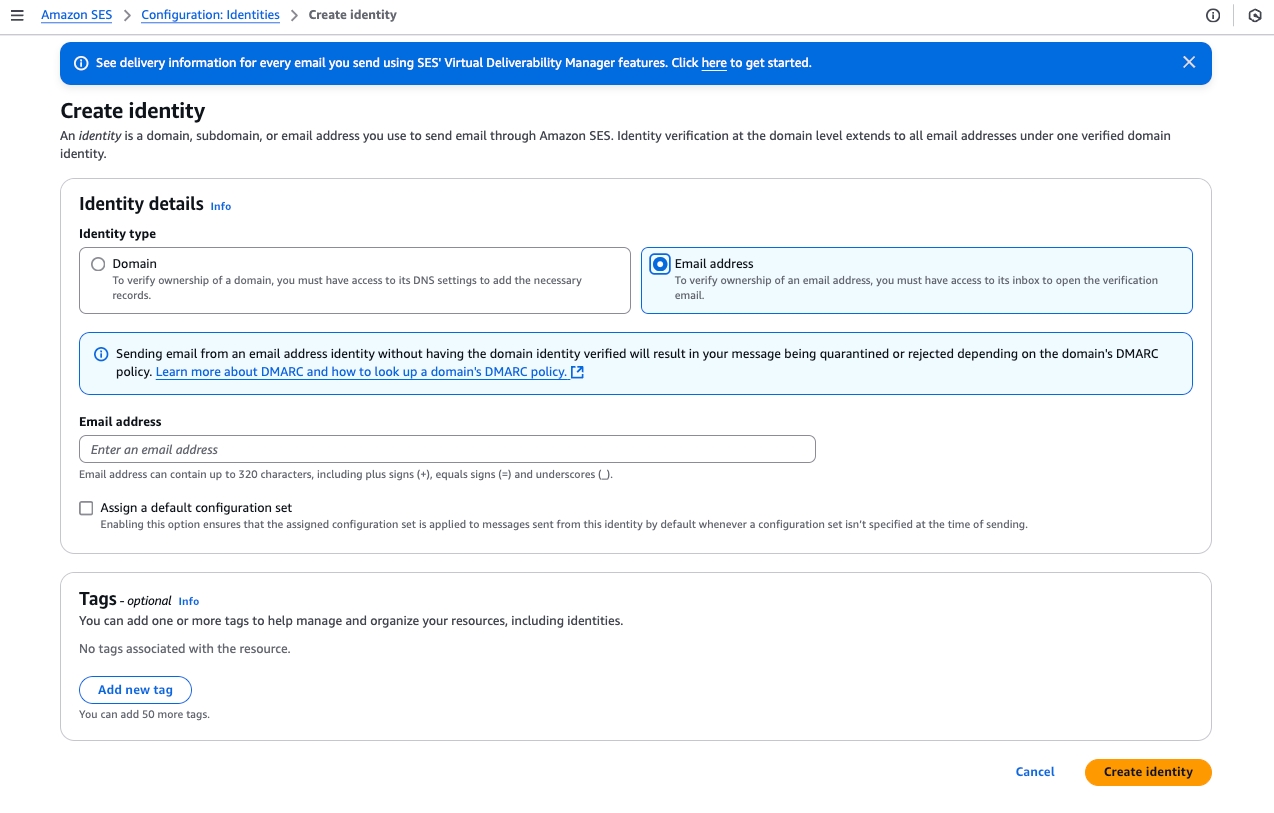
In the Amazon SES menu, go to Configuration > Identities, then click Create identity to set up sender information.
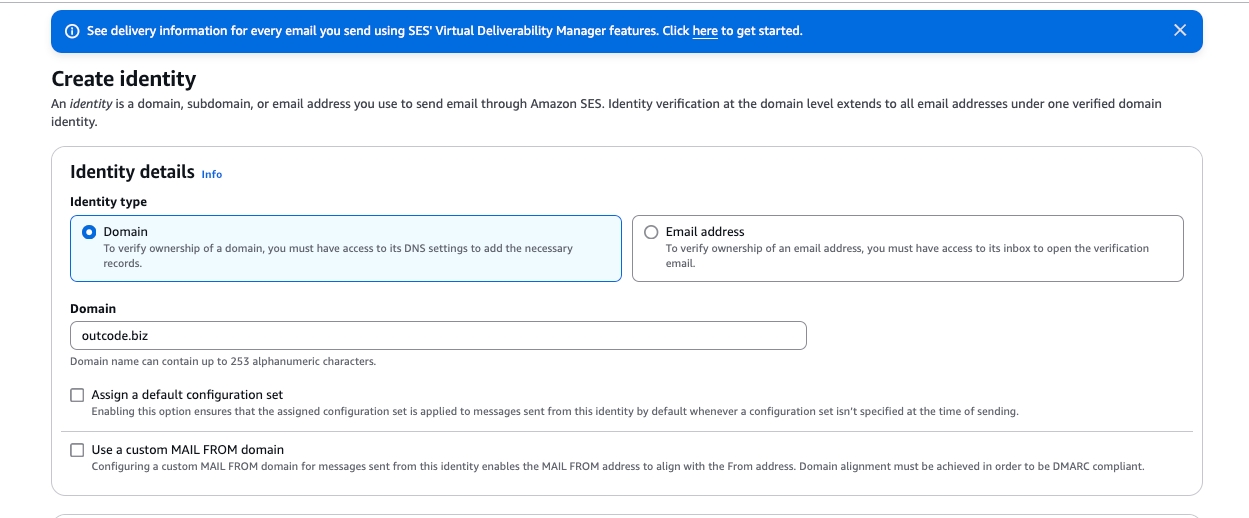
There are two methods for setting up an identity:
Domain Verification: Allows sending from all email addresses under the verified domain (see section 3-1)
Email Verification: Allows sending only from a specific email address (see section 3-2)
3-1. Domain Verification Method
Select Domain as the Identity type.
Enter the domain you wish to verify in the Domain field.
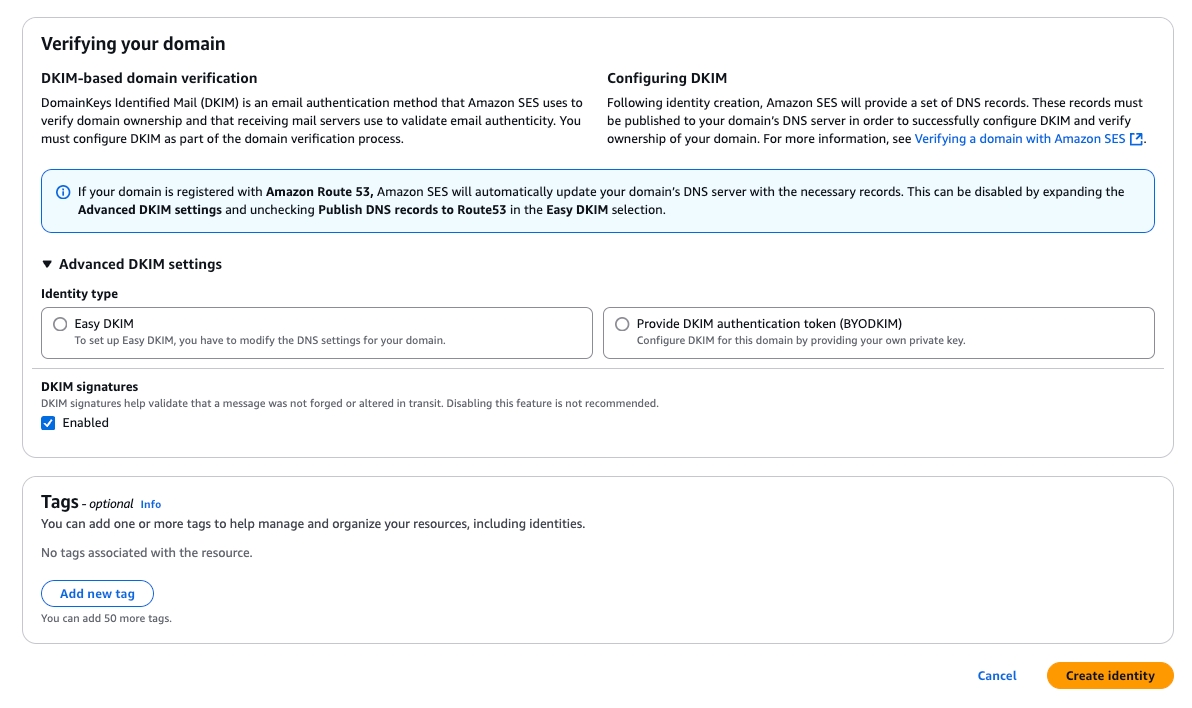
To verify the domain, add the DKIM records provided by AWS to the DNS settings page of your domain.
Once all configurations are complete, click the Create identity button to add the domain.
3-2. Email Verification Method
Set Identity type to Email address.
Enter the email address you want to register as the sender.
Click the Create identity button.
A verification email will be sent to the address you entered—click the link in the email to complete the verification process.
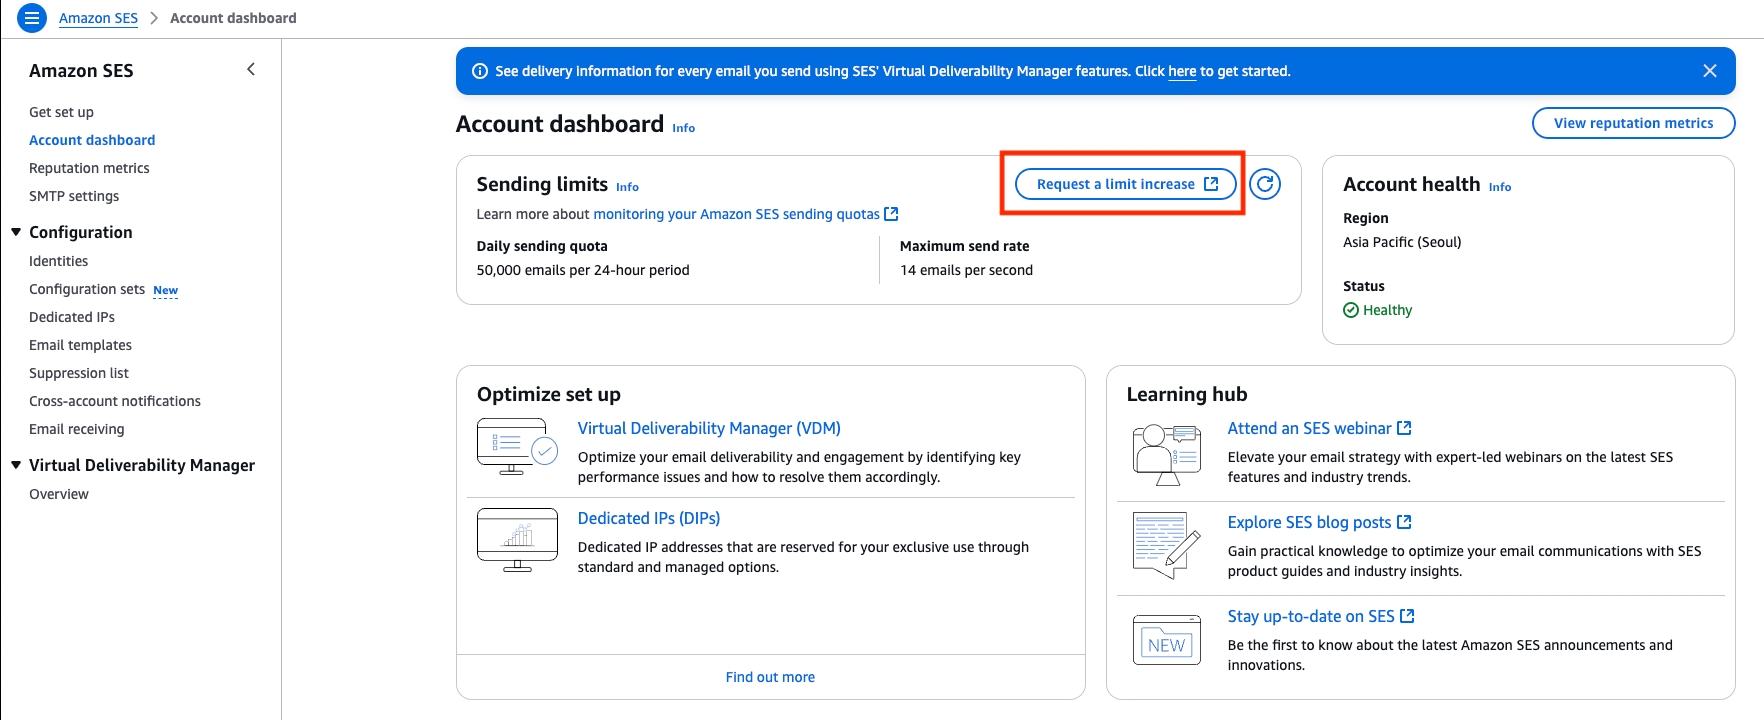
By default, SES has a sending limit of 200 emails per day and 1 email per second for first-time users. If you need to send larger volumes, you must request a sending limit increase separately.
Please verify that the created user and the access key are active.