Tips
Last updated
Was this helpful?
Last updated
Was this helpful?
Click the Automation menu at the top right.
Click the ➕ button to create a new automation page.
Once the schedule triggers, the system fetches the latest data and automatically applies the defined filters (rules) in real time.
You can filter specific data based on your custom rules. Examples:
Amount greater than 50,000
Product is Pro Plan
Only data from the last 7 days
For more advanced filtering options, to learn more.
When needed, you can transform the format of your data. Just like filters, these changes are applied automatically and in real time.
Examples:
"홍길동" → "홍**"
50000 → 50,000 (number formatting)
2023. 11. 14 오후 1:09:07 → 2023년 11월 14일 (date formatting)
ProductAAA → https://www.outcode.biz/product?q=ProductAAA (URL formatting)
For more detailed formatting options, [click here].
1. Add App
In the automation setup, click the ‘Add App’ icon.
Example: If you want to send Google Sheets data to Gmail, select the Gmail app.
2. Set Reference Values
You must assign the column containing the email address to the “Recipient Email Address” field.
Simply click the corresponding column, and it will be set automatically.
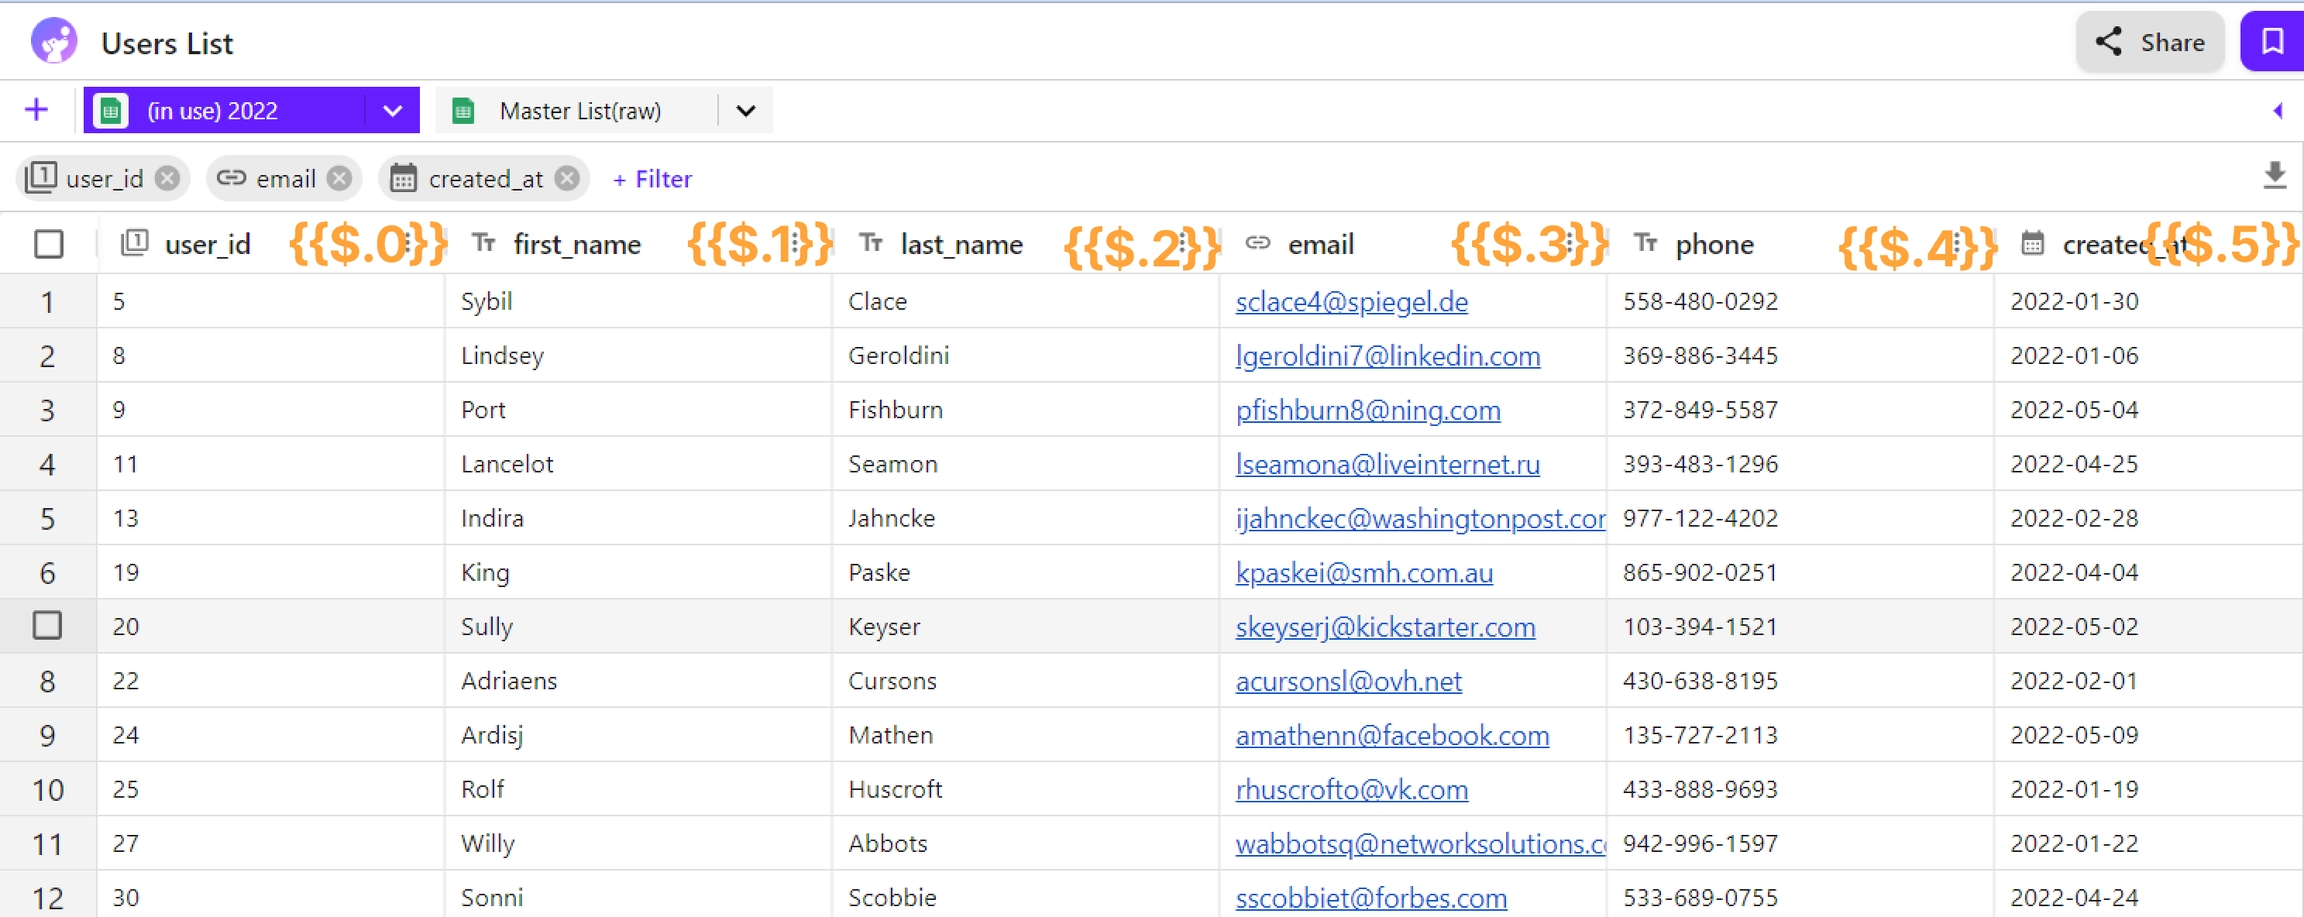
When composing an HTML email, to insert dynamic values:
Use the format {{$.number}} as shown below:
<p>Hello {{$.1}}, your order number is {{$.0}}.</p>Upon execution,
{{$.0}},{{$.1}}, etc., will be automatically replaced with the actual values from the row.
{{$.0}}
First column
{{$.1}}
Second column
{{$.2}}
Third column
...
...
Tip: Use real-time preview to ensure reference values are properly substituted.
There are two ways to execute automation:
Manual Execution: Only the row(s) manually clicked by the user will be executed.
Scheduled Execution: Automation runs automatically based on the configured interval or calendar date, executing only the filtered data that meets the defined rules. (If no data matches the rules, the automation will not run.)